Today is #sewmystyle2018 reveal day for July and I had hoped to show you my awesome booty-fitting True Bias Lander shorts AND a pair of Blank Slate Forsythe that I planned to hack into shorts, but I can’t.
Because I never got that far.
Instead you get to see my work in progress shorts. Specifically, the Lander shorts which I started with first.
And even though they totally look finished, they ain’t.
I chose a size 18 as that’s where my hip spread landed me in the finished measurements. Because I was using a very non-stretch poplin fabric, I figured a little extra room wouldn’t hurt (the size 16 is actually what my hips currently measure at 46″).
Based on my experience making pants and shorts before, my crotch curve is a little different from the standard female. I’m short in stature, which means my pelvis is a bit more compact too, so I usually have an extra inch of drop in the crotch. I don’t like this, so the first thing I did was create my crotch curve out of foil.
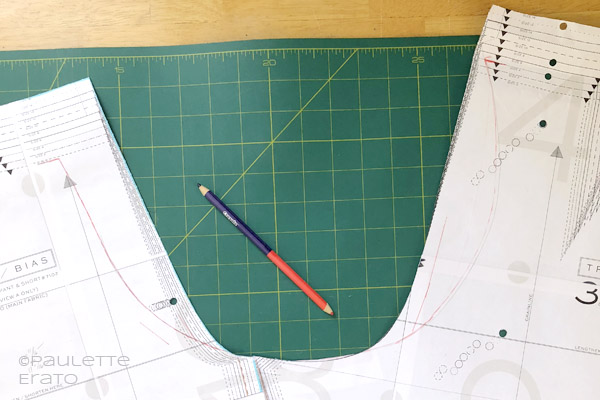
And then I compared it against the pattern:
You can see two things off the bat: I’m more curvy than the pattern and my “waist” is actually lower than both back and front rises.
I’ve mentioned before how I have a crease between my tummy rolls right at my belly button, and that no matter what, most of my bottoms will creep into it. This is what I have to go by as my “waist” no matter what. You can see the lines between where the shorts fit (top line) and where they want to slide (bottom line):
But I ignored that and focused solely on the crotch curve. 5 out of 4 Patterns has a really great tutorial for accommodating your foil curve to a pattern on their YouTube channel. What you will glean from that video is that even though my crotch curve is wildly different from the actual pattern, it didn’t necessarily mean I wanted to match them exactly.
So I blended the curve into the pattern as Rachelle instructed and went to town. The muslin was a tad tight, so I also added 1/2″ to each side seam and the waist band in order to not pop a seam or button. I also added an inch to the inseam because chub rub. This is the minimal length on shorts that usually keeps the thigh creep at bay.
Aaaaaaaand…they didn’t fit! In fact, they are a bit too big. I still have that crotch drop unless I wear them at my natural waist, which is just not comfortable since it’s basically at my diaphragm (and even so I still have to wear a belt to keep them from sliding) or fold the waistband over, which then lowers the waist to the optimal spot. I went back to my trusty crotch curve (now cut out onto paper) and noted that my front rise should be about the size 0 line and the back rise at the size 4. The difference between that and the size 18 line on both just about equals the distance that these want to slide down, as seen in orange:
So, it’s back to the drawing board with these. The first thing I’m going to do is lower the rise on my original muslin and see if that works. If that fixes the waistband issue, then we’ll see if I still need that extra inch, and what to do about about adding more room for my front and back curves.
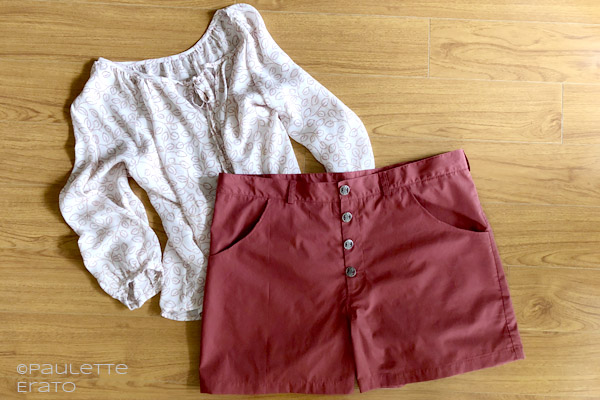
All that being said though, this was a pretty easy pattern to make. I opted for the inside front pockets with shank buttons and I really love the whole look. The back patch pockets are deep enough for my gigantic iPhone to comfortably slide into all the way. And the rust colored poplin is very much in keeping with this month’s signature color of carnelian.
I just might be able salvage these by using the elastic waist hack from Lladybird (here’s hoping!). Regardless I’ll stay at it. I plan to continue to tackle these this summer because I absolutely need more shorts now that the weather is in full on heat-from-hell mode.
Stay tuned!!