The husband of a mad sewist has to endure a lot. 2 years ago, when we first decided to elope, our lives were vastly different. For example, there weren’t piles of fabric dominating most of the corners of the house. I didn’t even own a sewing machine!
I bought my first one a mere 2 weeks later. But that’s a different story.
And 2 years later, here we are. Fabric piles everywhere competing for space with beer making equipment as he has since become a home brewer. Our respective hobbies pay mucho dividends though, as I get to enjoy all of his beer and he in turn gets the occasional wife-made garment.
Last year for our first anniversary, I made him a shirt. This year, I again made him a shirt. Before you pigeonhole me as a one-trick pony, this is a shirt he chose for his #menswearmakenine. Plus he needs more shirts.
Shirts shirts shirts! After a while that word starts to lose its meaning.
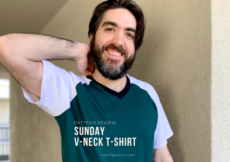
The garment in question is the McCall’s 7206, a bowling shirt style button up shirt with a one-piece collar (no band!). This is called a camp collar and is a casual look, often seen on Hawaiian shirts.
A quick Google search of camp collar brought up this Esquire article featuring a $750 Hawaiian-look shirt. Ha ha ha! But seriously, it’s a super easy collar to do and my new favorite shirt feature.
Because this was meant to be for our 2nd anniversary (because cotton is the traditional gift) I took him shopping for fabric. It’s his favorite activity, right after shoe shopping. As in, he hates it. But I didn’t want to make the decision for him, so he was a pretty good sport about it.
What I didn’t pay attention to, as we perused the limited shirting options at the local Joann Fabrics, is that there are 3 pieces to the front of the shirt. Which meant, with the plaid he chose, trying to match 4 front seams, 2 side seams AND the stripes across the front.
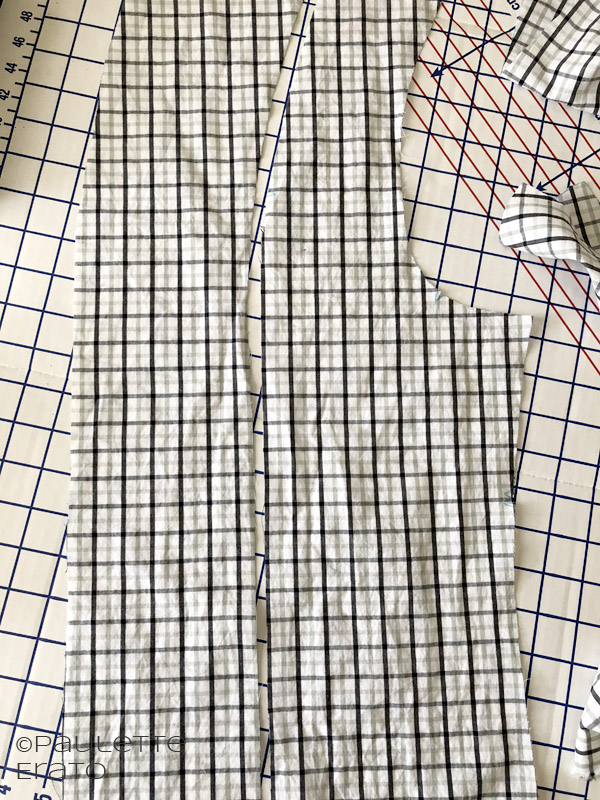
SO. MANY. SQUARES. Now maybe you’ll understand why I took 2 weeks to finish this make.
The shirt itself isn’t too difficult (assuming you aren’t trying to pattern match across seams) despite the standard Big 4 instructions. Thankfully Norris Danta Ford (Mimi G’s partner) has a very YouTube thorough tutorial which is simply brilliant.
When cutting the pieces out, I tried very hard to match seamlines, but I was still off by about 1/8” in some spots. It’s only obvious because the dominant black stripe in the fabric is also 1/8” wide. I ended up hand basting these seams to be as precise as possible.
That took about 2 episodes of Sense8, which are about 43 minutes long each. It took so long that I finally gave up on pattern matching when it came time to sew up the side seams (which is one of the last steps, curiously). El Husbando doesn’t care and I really just wanted him to be able to wear it already.
To ensure I could tell the backs from the front, I used bright pink washi tape on the back sides of all pieces. What I didn’t do was note which side each piece belonged to (right or left) so it took a little bit of puzzle matching to figure out which right front piece matched the middle front and so on.
For a bit of pizzaz I cut the facing and collar on the bias, which helped to tell the different pieces apart. And for a tiny extra bit of ease, I rotated the buttonholes to be horizontal instead of vertical. My newer machine is a champ at buttonholes, but this is the first time I use that function since I bought it. Again, placement along a plaid is always a bit scary, but we (the machine and I) worked it out ok.
And he looks adorable in it, if I do say so myself. Happy belated anniversary, my love!